
Safe ip Pro serial key or number

Safe ip Pro serial key or number
eznowa’s diary
SafeIP Pro Crack For Mac + License Key VPN Free Download:SafeIP is a free privacy utility that hides your device’s IP address to give you anonymity and security as you surf the web. It provides several easy ways to help you browse more anonymously cromwellpsi.com cookies, conceal your referrer and browser agent, block ads and prevent you from accessing known dangerous sites. And all for free, no adware or similar catches.
Apart from enhancing your privacy, this may also allow you access to some sites you wouldn’t normally be able to reach. If you’ve ever tried to view content and got a “not available in your country” message, for instance, that’s probably down to your IP address, and getting another may help. Click the “Settings” button and you’ll find SafeIP has many more options. It can also remove your browser’s user agent header, for instance.
And there are options to block cookies or website referrers. SafeIP Pro Serial Key With Keygen Full Crack Version:The SafeIP you will remain anonymous while browsing the internet. With few tools at your disposal, you will find a way to avoid misleading advertising, tracking, capturing personal information and other problems that abound on the cromwellpsi.com, You will notice that your navigation is not affected and you will go discreetly through places that once seemed highly dangerous.
Whatever the situation may be, your goal is without a doubt to order SafeIP. Download Safeip Pro Full Cracked - licensethenew. SafeIP - IP -. SafeIP Pro Final Latest Version – SafeIP is a free tool to hide your IP address and protect the user's identity on the Web.
In addition to that, the change in your IP makes believe region detectors that belong to a certain country, which at the same time will give you access to previously restricted cromwellpsi.comes Activation Key + Linux:. SafeIP Free & Safe Download!. SafeIP Latest Version!. Also, Works with All Windows versions. Users choice!How to Install Serial Number And License Number:. First of all download software below link. So Next step install the SafeIP on selecting the folder.
Safeip Pro Crack Windows 10
That’s all Done and Enjoy.
eznowa
Источник: [cromwellpsi.com]SafeIP | MB
SafeIP Full Version With Serial Key Free Download Crack Patch Keygen Portable Serial Key Licence Key Full Final Registered version Product key Activation Key Activation Code
SafeIP Full Version With Serial Key Free Download is a free Internet privacy program for protecting your online identity and unblocking websites. Surf anonymously, hide your IP address, protect your online identity, unblock websites, and more with SafeIP. You can change your IP proxy location, view your original IP address, and see a quick overview of which protection settings you have turned on. Easily select your preferred proxy IP location and change your IP at anytime.
The automatic startup option will ensure your IP is protected at all times, even before your Internet connection starts. Stop ads, cookies, and malware, while using our proprietary Browser Fingerprint anti-tracking technology. Application translations available in multiple languages. SafeIP also has the very suefull features such as Malware Protection, Ad Blocking, Cookie Protection, Referring URL Protection, Browser ID Protection, WiFi and DNS Protection.
When the Malware Protection feature is enabled, SafeIP will block a list of known malware, spam, and phishing sites. The database for this feature is updated in real-time. Enabling this feature protects from new threats, it does not scan your PC for current and past infections.
When Ad Blocking is enabled, SafeIP will subscribe to a real-time database of advertisement websites and block them. This feature will speed up your web browsing, as fewer texts, images or videos from advertisements will load.
Enabling Cookie Protection feature will block all cookies. Your web browser will not be able to store any cookies, which may prevent some websites from working. When this feature is on, websites will not be able to track you with cookies.
To prevent your web browser from exposing your Referring URL, also known as a &#;Referer Header&#;, enable the Referring URL Protection feature on the Settings window. This feature is compatible with all web browsers.
All applications are supported to use SafeIP, but you must have a Pro License to use Torrent programs and to unlock extra features.
&#; Anonymous proxy IPs help hide your true online identity and unblock websites. Protect your online identity by hiding your IP from websites, email, games, and more.
&#; Secure SSL proxy encryption with WiFi protection. Encrypt all your Internet traffic with a private proxy, either browsing at home or on public WiFi hotspots.
&#; Fast unlimited access to unblock any website. Choose the anonymous IP location closest to you for the fastest connection speeds.
&#; Free download for Windows with no ads or expiration. SafeIP can be used completely free for unlimited use, without advertisements and never expires.
Supported OS: Windows , XP, Vista, Windows 7, Windows 8 (bit & bit).
Download
Install Tableau Desktop or Tableau Prep Builder from the User Interface
Note: If you are looking for information about how to install Tableau Server, see the Install and Configure(Link opens in a new window) section in the Tableau Server Help instead.
This topic describes how to install and activate Tableau Desktop or Tableau Prep Builder from the user interface. For information about how to install and activate your product from the command line, see Install Tableau Desktop and Tableau Prep Builder from the Command Line(Link opens in a new window).
Before you begin
To install Tableau Desktop or Tableau Prep Builder you will need two things; a Creator product key (the key number starts with the letters TC) and the installer for the version you want to install. For information about what applications are included with a Creator product key, see the Tableau Pricing(Link opens in a new window) page.
Where's the installer?
Important: Starting with version , Tableau Desktop, Tableau Reader, and Tableau Public (desktop) only run on a bit operating system. Tableau Prep Builder is only available for a bit operating system. If you want to install Tableau Desktop on a bit operating system, open the Product Downloads and Release Notes(Link opens in a new window) page and download the installer for version or earlier and follow the install instructions in the Tableau Desktop Deployment(Link opens in a new window) guide for that version.
For the most current version of Tableau Desktop or Tableau Prep Builder, go to the Customer Portal(Link opens in a new window) page. In the Product Downloads section, click the appropriate link to download the installer for your product and operating system.
You can also find the installers for all products and versions on the Product Downloads and Release Notes(Link opens in a new window) page.
Open the Product Downloads and Release Notes(Link opens in a new window) page and select Tableau Desktop or Tableau Prep Builder from the list on the left side of the page.
Click on the version you want to install.
In the Download Files section of the page, click on the installer for your operating system to download it.
Where's my product key?
You need your product key to activate Tableau Desktop and Tableau Prep Builder after the install process is finished. If you have a creator license, the same key activates both Tableau Desktop and Tableau Prep Builder. You can always view your product key in the Customer Portal(Link opens in a new window). For more information about license types, see User-Based licenses(Link opens in a new window) in the Tableau Server help.
Note: If you have trouble signing in to the Customer Portal page, or if you need help retrieving your product key, contact Customer Service(Link opens in a new window) and provide your name, company, phone number, and email address.
As a first time user
Sign in to the Customer Portal(Link opens in a new window) page on the Tableau website using your email address and password. The information you need to sign into the portal for the first time is sent to you in a welcome email from Tableau after you purchase(Link opens in a new window) the product.
At the top of the Tableau Customer Portal page, click My Keys.
A table opens, listing any product keys assigned to you. Copy your product key from the Key Name column in the table. Keep this key ready and secure.
Note: This example does not show any actual keys. The highlighted area shows where your key would be listed.
As an existing user
Open your existing version of Tableau Desktop or Tableau Prep Builder.
From the top menu, click Help > Manage Product Keys.
Copy your product key from the Product Key column in the table. Keep this key ready and secure.
If you are not able to open the Manage Product Keys dialog to see your key, log into the Customer Portal(Link opens in a new window) and follow the instructions for first time users above.
If you don't have a product key, try the day Free Trial(Link opens in a new window) or download the Tableau Desktop Public Edition(Link opens in a new window) instead. If you are a student or teacher, go to the Academic programs(Link opens in a new window) page to request a license and receive instructions about how to download your copy of Tableau Desktop or Tableau Prep Builder.
Install the product
Download the installer using the instructions in Where's the installer? For Mac, the installer is downloaded to your Downloads folder.
Note: The installer detects and displays the user interface based on the operating system display language setting.
If you're using a deployment tool that requires the Windows installer ( file) to install Tableau Desktop or Tableau Prep Builder, follow the instructions in Extract and run the Windows (MSI) installer to extract the file from the Tableau installer file.
Click the tab for the product you are installing to view the installation steps.
As an Administrator, log in to the computer where you are installing Tableau Desktop.
Depending on your operating system, do one of the following:
For Windows: Run the installer and follow the prompts.
For Mac: Open the Disk image file (.DMG) and double-click the installer package (.PKG) to start the installation.
Drivers for some data sources are installed automatically when you install Tableau Desktop. See the Database drivers installed with Tableau Desktop and Tableau Prep Builder section in the Before You Install topic for specifics.
To enable or disable usage reporting complete the following steps for your operating system.
This option allows us to gather usage pattern data to improve the product. For more information about this option and how to turn it off after installation, see Turn off usage reporting.
Windows
To opt out of providing usage data, select the Don't send product usage data check box.
Mac
On the Installation Type step, in the bottom-left of the install wizard, click Customize. To opt out of sending product usage data, select the Don't send product usage data check box.
On the Mac you can also change the settings on this page to customize your install.
Note: Starting in Tableau Desktop version , only the PostgreSQL driver is installed automatically on the Mac. If you need other database drivers, you can install them from the Driver Download(Link opens in a new window) page.
(Optional) On Windows, to customize the install, on the Install welcome screen, click Customize and change any of the following options:
Install location: Specify a different location to install Tableau Desktop.
Important: If you specify a custom directory for the install location and plan to install future releases to this same location, you need to specify a version specific sub-folder to install to. Otherwise you will need to uninstall the previous version first. Side-by-side installs of multiple versions in the same sub-directory is not supported.
Create a desktop shortcut: Clear the check box if you don't want to automatically create a desktop shortcut for Tableau.
Create a Start menu shortcut: Clear the check box if you don't want to automatically add a shortcut for Tableau to the Start menu.
Check for Tableau product updates: Clear the check box if you want to disable the product update feature. This feature checks for maintenance updates and installs them automatically. If you disable this option at install it also disables the menu option for users. For more information about the product update feature, see Control Product Updates for Tableau Desktop.
Install database drivers: Clear the check box if you don't want to automatically install the database drivers. You can also disable one or more of the drivers from the command line. For more information about this option, see Installer properties(Link opens in a new window).
Click Install to begin installation. If you run into any difficulties, see Troubleshoot Your Tableau Desktop or Tableau Prep Builder Installation.
After installation is complete, you will need to activate and register the product to begin using it. For more information, see Activate and register your product.
Important: Tableau Prep Builder is designed to work with Tableau Desktop. It is recommended that you install Tableau Prep Builder on the same machine as Tableau Desktop.
Do not install Tableau Prep Builder on the same computer running Tableau Server. Tableau Server Resource Manager (SRM) can't distinguish between Tableau Server protocol server process and Tableau Prep Builder protocol server process. If the computer resources are exhausted, SRM may terminate the protocol server process belonging to Tableau Prep Builder, which has no recovery mechanism.
As an Administrator, log in to the computer where you are installing Tableau Prep Builder.
Depending on your operating system, do one of the following:
For Windows: Run the installer and follow the prompts.
For Mac: Open the Disk image file (.DMG), and then double-click the installer package (.PKG) to start the installation.
When prompted, accept the licensing agreement to continue the installation.
To enable or disable usage reporting complete the following steps for your operating system.
This option allows us to gather usage pattern data to improve the product. For more information about this option and how to turn it off after installation, see Turn off usage reporting.
Windows
To opt out of providing usage data, select the Don't send product usage data check box.
Mac
On the Installation Type step, in the bottom-left of the install wizard, click Customize. To opt out of sending product usage data, select the Don't send product usage data check box.
(Optional) To customize the install, on the Install welcome screen for Windows or on the Installation Type step for the Mac, click Customize and change any of the following options:
Windows
Install location: Specify a different location to install Tableau Prep Builder.
Create a desktop shortcut: Clear the check box if you don't want to automatically create a desktop shortcut for Tableau Prep Builder.
Create a Start menu shortcut: Clear the check box if you don't want to automatically add a shortcut for Tableau Prep Builder to the Start menu
Enable error reporting : If Tableau Prep Builder has a problem and shuts down unexpectedly, crash dump files and logs are generated and placed in your My Tableau Prep Builder Repository > Logs and My Tableau Prep Builder Repository > Logs > crashdumps files.
To turn off this option during install, clear this check box during install. To turn this option off after installation see Turn off error reporting(Link opens in a new window).
Install database drivers: Clear the check box if you don't want to automatically install the database drivers.
Important:Tableau Prep Builder is only available in bit and If you already have bit drivers installed, you'll need to install the bit version of those drivers to connect to your data with Tableau Prep Builder.
Mac
- Create a desktop shortcut: Select the check box to automatically create a desktop shortcut for Tableau Prep Builder.
- Don't send product usage data Select the check box to opt out of sending product usage data.
- Enable crash recovery (version and later): Clear the check box to turn off file recovery. In the event of a crash, flow files won't automatically be saved. For more information about managing this option post-install, see Turn off file recovery.
PostgreSQL database driver: Clear the check box if you don't want to automatically install the database driver.
Note: Starting in version , only the PostgreSQL driver is installed automatically on the Mac. If you need other database drivers, you can install them from the Driver Download(Link opens in a new window) page.
Click Install to begin the product installation.
Activate and register your product
Important: The Tableau licensing service was moved to a new data center on October 6, This means that any environments that required special configuration (static IP safe listing for example) to access cromwellpsi.com or cromwellpsi.com will need to be updated. For more information, see Tableau Community(Link opens in a new window).
After the installation process is finished, the next step is to register and activate your product. Use one of the following options:
After the installation process is finished, open Tableau Desktop. This launches the Tableau Registration form where you can register and activate your product.
Fill out the fields on the registration form and then click Activate Tableau.
If you are activating Tableau Desktop as a trial, click Start trial now at the bottom of the screen.
Select one of the following options:
Activate with a product key: Use this option if you are activating using the user interface and have a product key.
Activate by signing into a server:Use this option if you are using login-based license management to activate your product.
If you are activating with a product key, delete any existing text in the Enter product key field, copy your product key (from the location that you saved it to from the Where's my product key? procedure) and paste it into the text box, then click Activate.
A second screen appears to complete the activation process. Click Continue to finish the process.
If Tableau can't connect to the site that authenticates that product key, it can't complete the activation and you must activate the product offline. Follow the instructions in Activate your product offline to complete the activation process.
If you are activating using login-based license management enter the URL for your server and click Connect.
Sign into your server, then complete the registration page if needed, and click Register.
Launch Tableau Prep Builder.
In the Activation page, select one of the following options:
- Start a trial: Select this option if you don't have a product key but want to try Tableau Prep Builder.
- Activate with a product key: Use this option if you are activating using the user interface and have a product key.
- Activate by signing in to a server: Use this option if you are using login-based license management to activate your product.
- Purchase a license: Select this option to navigate to the Tableau website to purchase a license.
If you are activating with a product key, delete any existing text in the Enter product key field, copy your product key (from the location that you saved it to from the Where's my product key? procedure) and paste it into the text box, then click Activate.
Complete the registration form, and then click Register.
If you are activating using login-based license management enter the URL for your server and click Connect.
Sign into your server, then complete the registration page if needed, and click Register.
When your registration is complete, Tableau Prep Builder opens and you can start preparing your data.
New to Tableau Prep Builder? Try the Get Started tutorial(Link opens in a new window) to learn how to build your first flow.
Activate your product offline
Note: If you're upgrading versions and you've paid your maintenance (Tableau Desktop only) since the last time offline activation was completed, contact Tableau Customer Service(Link opens in a new window) via email to get an updated product key before continuing with offline activation.
If you're installing the product on a computer that doesn't have internet access, or if your company firewall or proxy restricts access to the site, then you must complete the steps below to finish activating your product. You will need access to another computer that has internet access to complete all the steps in this procedure.
To activate Tableau Prep Builder offline, you will need your product key and Tableau Desktop version or later installed on the same computer that is offline.
In the Activate Tableau dialog, click Activate.
Tableau prompts you to save a file that you can use for offline activation. Click Save.
Note: If you're performing the offline activation process because of firewall or proxy restrictions, you might not be prompted to save the activation file. In that case, manually disconnect the computer from the network and then restart this procedure so that you can be prompted to save the activation file.
Save the file to a location that you can reach from a computer that does have internet access. Use the default file name ().
Click Exit.
From a computer that has internet access, open a web browser and go to the Activation(Link opens in a new window) page on the Tableau website.
Complete the instructions for Offline Activation to submit your file and create a file.
Save the file and then copy it to the computer where you installed Tableau Desktop.
On the offline computer, double-click the file to perform the offline activation.
Launch Tableau Desktop.
From the top menu, select Help > Manage Product Keys.
In the Manage Product Keys dialog, click Activate.
Enter your Tableau Prep Builder product key and then click Activate.
Tableau Desktop detects that you are offline and shows the following message. Click Save to create an activation file.
Save the file to a location that you can access from the offline computer. Use the default file name ().
- From a computer that has internet access, open a web browser and go to the Activation(Link opens in a new window) page on the Tableau website.
Follow the instructions and select the () file that you just created and upload it to create a create a file. You will need this file to activate Tableau Prep Builder.
Click Upload Activation File. You should receive a confirmation dialog that the upload was successful.
In the confirmation dialog click the link to download the activation file to complete the activation process.
Copy the cromwellpsi.com file to the computer where you installed Tableau Prep Builder.
On the offline computer, double-click the cromwellpsi.com file to perform the offline activation.
Close Tableau Desktop.
Launch Tableau Prep Builder. You will be prompted to complete the registration process form to register the product. If you have previously registered a Tableau product, the fields may be populated automatically.
Change default settings
During installation, Tableau configures default settings for your display language and repository location. If you want to change those settings you can do this after install is complete.
Tableau also enables certain features for you by default such as usage reporting or automated product updates (Tableau Desktop only). For information about how to turn off these features and more, see Change Installation Settings after Installation(Link opens in a new window).
Set your display language (optional)
When you first run Tableau Desktop or Tableau Prep Builder, it recognizes your computer locale using the User Locale setting and uses the appropriate language if it is supported. If you are using an unsupported language, the application defaults to English.
You can configure Tableau Desktop or Tableau Prep Builder to display the user interface (menus, messages, etc.) in a different language by selecting Help > Choose Language from the top menu. Restart the application to apply the change.
For Tableau Prep Builder, the display format for numbers and dates is based on the locale of the operating system on the machine where the application is installed. For Tableau Desktop you can configure date and number formatting for your workbooks. For more information see Language and Locale(Link opens in a new window) in the Tableau User help.
Change your My Tableau Repository location (optional)
During install, Tableau Desktop and Tableau Prep Builder automatically creates a My Tableau <application> Repository folder structure in your documents folder on your computer. If you need to move this repository to another location, for example because you are required to have your data on a network server instead of on your local machine, you can specify a new location and point Tableau Desktop or Tableau Prep Builder to the new folder.
When setting a new location for your repository, the following rules apply:
The new folder must be a directory.
You must have permissions to write to the new folder.
The new folder can't be located in the existing My Tableau Repository folder structure.
Note: Changing the repository location does not move the files contained in the original repository. Instead, Tableau creates a new repository where you can store your files.
Open Tableau Desktop or Tableau Prep Builder.
From the top menu, select File >Repository Location.
In the Select Repository Folder dialog, select a new folder that will act as the new repository location.
Restart the application to use the new repository.
What’s New in the Safe ip Pro serial key or number?
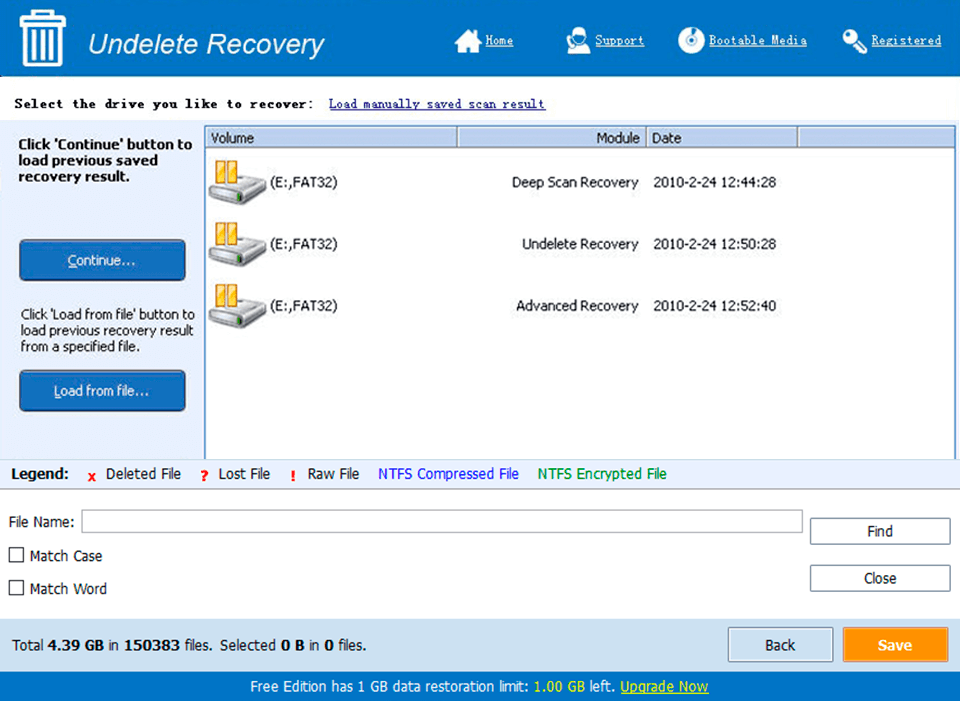
Screen Shot
System Requirements for Safe ip Pro serial key or number
- First, download the Safe ip Pro serial key or number
-
You can download its setup from given links:

Safe ip Pro serial key or number & Serial Key Download

Safe ip Pro serial key or number& Apps for Laptop & PC Free Download
