
1 st Mass Mailer 2.3 serial key or number

1 st Mass Mailer 2.3 serial key or number
cromwellpsi.com
1 What is Action Mailer?
Action Mailer allows you to send emails from your application using mailer classes and views.
Mailers are similar to controllers
They inherit from and live in . Mailers also work very similarly to controllers. Some examples of similarities are enumerated below. Mailers have:
- Actions, and also, associated views that appear in .
- Instance variables that are accessible in views.
- The ability to utilise layouts and partials.
- The ability to access a params hash.
2 Sending Emails
This section will provide a step-by-step guide to creating a mailer and its views.
Walkthrough to Generating a Mailer
Create the Mailer
As you can see, you can generate mailers just like you use other generators with Rails.
If you didn't want to use a generator, you could create your own file inside of , just make sure that it inherits from :
Edit the Mailer
Mailers have methods called "actions" and they use views to structure their content. Where a controller generates content like HTML to send back to the client, a Mailer creates a message to be delivered via email.
contains an empty mailer:
Let's add a method called , that will send an email to the user's registered email address:
Here is a quick explanation of the items presented in the preceding method. For a full list of all available options, please have a look further down at the Complete List of Action Mailer user-settable attributes section.
- - This is a hash of default values for any email you send from this mailer. In this case we are setting the header to a value for all messages in this class. This can be overridden on a per-email basis.
- - The actual email message, we are passing the and headers in.
Create a Mailer View
Create a file called in . This will be the template used for the email, formatted in HTML:
Let's also make a text part for this email. Not all clients prefer HTML emails, and so sending both is best practice. To do this, create a file called in :
When you call the method now, Action Mailer will detect the two templates (text and HTML) and automatically generate a email.
Calling the Mailer
Mailers are really just another way to render a view. Instead of rendering a view and sending it over the HTTP protocol, they are sending it out through the email protocols instead. Due to this, it makes sense to have your controller tell the Mailer to send an email when a user is successfully created.
Setting this up is simple.
First, let's create a scaffold:
Now that we have a user model to play with, we will edit the file, make it instruct the to deliver an email to the newly created user by editing the create action and inserting a call to right after the user is successfully saved.
Action Mailer is nicely integrated with Active Job so you can send emails outside of the request-response cycle, so the user doesn't have to wait on it:
Active Job's default behavior is to execute jobs via the adapter. So, you can use to send emails asynchronously. Active Job's default adapter runs jobs with an in-process thread pool. It's well-suited for the development/test environments, since it doesn't require any external infrastructure, but it's a poor fit for production since it drops pending jobs on restart. If you need a persistent backend, you will need to use an Active Job adapter that has a persistent backend (Sidekiq, Resque, etc).
When calling the job will be placed under queue. Make sure Active Job adapter supports this queue, otherwise the job may be silently ignored preventing email delivery. You can change this queue name by specifying option.
If you want to send emails right away (from a cronjob for example) just call :
Any key value pair passed to just becomes the for the mailer action. So makes and available in the mailer action. Just like controllers have params.
The method returns an object which can then be told to or to send itself out. The object is a wrapper around a . If you want to inspect, alter, or do anything else with the object you can access it with the method on the object.
Auto encoding header values
Action Mailer handles the auto encoding of multibyte characters inside of headers and bodies.
For more complex examples such as defining alternate character sets or self-encoding text first, please refer to the Mail library.
Complete List of Action Mailer Methods
There are just three methods that you need to send pretty much any email message:
- - Specifies any header on the email you want. You can pass a hash of header field names and value pairs, or you can call .
- - Allows you to add attachments to your email. For example, .
- - Sends the actual email itself. You can pass in headers as a hash to the mail method as a parameter, mail will then create an email, either plain text, or multipart, depending on what email templates you have defined.
Adding Attachments
Action Mailer makes it very easy to add attachments.
Pass the file name and content and Action Mailer and the Mail gem will automatically guess the mime_type, set the encoding, and create the attachment.
When the method will be triggered, it will send a multipart email with an attachment, properly nested with the top level being and the first part being a containing the plain text and HTML email messages.
Mail will automatically Base64 encode an attachment. If you want something different, encode your content and pass in the encoded content and encoding in a to the method.
Pass the file name and specify headers and content and Action Mailer and Mail will use the settings you pass in.
If you specify an encoding, Mail will assume that your content is already encoded and not try to Base64 encode it.
Making Inline Attachments
Action Mailer makes inline attachments, which involved a lot of hacking in pre versions, much simpler and trivial as they should be.
First, to tell Mail to turn an attachment into an inline attachment, you just call on the attachments method within your Mailer:
Then in your view, you can just reference as a hash and specify which attachment you want to show, calling on it and then passing the result into the method:
As this is a standard call to you can pass in an options hash after the attachment URL as you could for any other image:
Sending Email To Multiple Recipients
It is possible to send email to one or more recipients in one email (e.g., informing all admins of a new signup) by setting the list of emails to the key. The list of emails can be an array of email addresses or a single string with the addresses separated by commas.
The same format can be used to set carbon copy (Cc:) and blind carbon copy (Bcc:) recipients, by using the and keys respectively.
Sending Email With Name
Sometimes you wish to show the name of the person instead of just their email address when they receive the email. You can use for that:
Mailer Views
Mailer views are located in the directory. The specific mailer view is known to the class because its name is the same as the mailer method. In our example from above, our mailer view for the method will be in for the HTML version and for the plain text version.
To change the default mailer view for your action you do something like:
In this case it will look for templates at with name . You can also specify an array of paths for , and they will be searched in order.
If you want more flexibility you can also pass a block and render specific templates or even render inline or text without using a template file:
This will render the template 'another_cromwellpsi.com' for the HTML part and use the rendered text for the text part. The render command is the same one used inside of Action Controller, so you can use all the same options, such as , etc.
If you would like to render a template located outside of the default directory, you can apply the , like so:
You can also consider using the append_view_path method.
Caching mailer view
You can perform fragment caching in mailer views like in application views using the method.
And in order to use this feature, you need to configure your application with this:
Fragment caching is also supported in multipart emails. Read more about caching in the Rails caching guide.
Action Mailer Layouts
Just like controller views, you can also have mailer layouts. The layout name needs to be the same as your mailer, such as and to be automatically recognized by your mailer as a layout.
In order to use a different file, call in your mailer:
Just like with controller views, use to render the view inside the layout.
You can also pass in a option to the render call inside the format block to specify different layouts for different formats:
Will render the HTML part using the file and the text part with the usual file if it exists.
Previewing Emails
Action Mailer previews provide a way to see how emails look by visiting a special URL that renders them. In the above example, the preview class for should be named and located in . To see the preview of , implement a method that has the same name and call :
Then the preview will be available in http://localhost/rails/mailers/user_mailer/welcome_email.
If you change something in or the mailer itself, it'll automatically reload and render it so you can visually see the new style instantly. A list of previews are also available in http://localhost/rails/mailers.
By default, these preview classes live in . This can be configured using the option. For example, if you want to change it to , you can configure it in :
Generating URLs in Action Mailer Views
Unlike controllers, the mailer instance doesn't have any context about the incoming request so you'll need to provide the parameter yourself.
As the usually is consistent across the application you can configure it globally in :
Because of this behavior you cannot use any of the helpers inside of an email. Instead you will need to use the associated helper. For example instead of using
You will need to use:
By using the full URL, your links will now work in your emails.
Generating URLs with
generates a full URL by default in templates.
If you did not configure the option globally make sure to pass it to .
Generating URLs with Named Routes
Email clients have no web context and so paths have no base URL to form complete web addresses. Thus, you should always use the "_url" variant of named route helpers.
If you did not configure the option globally make sure to pass it to the URL helper.
non- links require rails-ujs or jQuery UJS, and won't work in mailer templates. They will result in normal requests.
Adding images in Action Mailer Views
Unlike controllers, the mailer instance doesn't have any context about the incoming request so you'll need to provide the parameter yourself.
As the usually is consistent across the application you can configure it globally in :
Now you can display an image inside your email.
Sending Multipart Emails
Action Mailer will automatically send multipart emails if you have different templates for the same action. So, for our example, if you have and in , Action Mailer will automatically send a multipart email with the HTML and text versions setup as different parts.
The order of the parts getting inserted is determined by the inside of the method.
Sending Emails with Dynamic Delivery Options
If you wish to override the default delivery options (e.g. SMTP credentials) while delivering emails, you can do this using in the mailer action.
Sending Emails without Template Rendering
There may be cases in which you want to skip the template rendering step and supply the email body as a string. You can achieve this using the option. In such cases don't forget to add the option. Rails will default to otherwise.
3 Action Mailer Callbacks
Action Mailer allows for you to specify a , and .
Filters can be specified with a block or a symbol to a method in the mailer class similar to controllers.
You could use a to populate the mail object with defaults, delivery_method_options or insert default headers and attachments.
- You could use an to do similar setup as a but using instance variables set in your mailer action.
- Mailer Filters abort further processing if body is set to a non-nil value.
4 Using Action Mailer Helpers
Action Mailer inherits from , so you have access to most of the same helpers as you do in Action Controller.
There are also some Action Mailer-specific helper methods available in . For example, these allow accessing the mailer instance from your view with , and accessing the message as :
5 Action Mailer Configuration
The following configuration options are best made in one of the environment files (cromwellpsi.com, cromwellpsi.com, etc)
| Configuration | Description |
|---|---|
| Generates information on the mailing run if available. Can be set to for no logging. Compatible with both Ruby's own and loggers. | |
Allows detailed configuration for delivery method:
| |
Allows you to override options for the delivery method.
| |
| Whether or not errors should be raised if the email fails to be delivered. This only works if the external email server is configured for immediate delivery. | |
Defines a delivery method. Possible values are:
| |
| Determines whether deliveries are actually carried out when the method is invoked on the Mail message. By default they are, but this can be turned off to help functional testing. If this value is , array will not be populated even if is . | |
| Keeps an array of all the emails sent out through the Action Mailer with delivery_method :test. Most useful for unit and functional testing. | |
| Allows you to set default values for the method options (, , etc.). |
For a complete writeup of possible configurations see the Configuring Action Mailer in our Configuring Rails Applications guide.
Example Action Mailer Configuration
An example would be adding the following to your appropriate file:
Action Mailer Configuration for Gmail
As Action Mailer now uses the Mail gem, this becomes as simple as adding to your file:
As of July 15, , Google increased its security measures and now blocks attempts from apps it deems less secure. You can change your Gmail settings here to allow the attempts. If your Gmail account has 2-factor authentication enabled, then you will need to set an app password and use that instead of your regular password. Alternatively, you can use another ESP to send email by replacing 'cromwellpsi.com' above with the address of your provider.
6 Mailer Testing
You can find detailed instructions on how to test your mailers in the testing guide.
7 Intercepting and Observing Emails
Action Mailer provides hooks into the Mail observer and interceptor methods. These allow you to register classes that are called during the mail delivery life cycle of every email sent.
Intercepting Emails
Interceptors allow you to make modifications to emails before they are handed off to the delivery agents. An interceptor class must implement the method which will be called before the email is sent.
Before the interceptor can do its job you need to register it with the Action Mailer framework. You can do this in an initializer file
The example above uses a custom environment called "staging" for a production like server but for testing purposes. You can read Creating Rails environments for more information about custom Rails environments.
Observing Emails
Observers give you access to the email message after it has been sent. An observer class must implement the method, which will be called after the email is sent.
Like interceptors, you need to register observers with the Action Mailer framework. You can do this in an initializer file
Feedback
You're encouraged to help improve the quality of this guide.
Please contribute if you see any typos or factual errors. To get started, you can read our documentation contributions section.
You may also find incomplete content or stuff that is not up to date. Please do add any missing documentation for master. Make sure to check Edge Guides first to verify if the issues are already fixed or not on the master branch. Check the Ruby on Rails Guides Guidelines for style and conventions.
If for whatever reason you spot something to fix but cannot patch it yourself, please open an issue.
And last but not least, any kind of discussion regarding Ruby on Rails documentation is very welcome on the rubyonrails-docs mailing list.
1st mass mailer افضل برنامج لأرسال رسائل السبام
السلام عليكم اخواني في موضوع جديد وهو برنامج Fast Mass Mailer
على حسب تجربتي للبرنامج فهو افضل وأحد اقوى برامج ارسال السبام المدفوووعة
هههه اعرف ان اغلب الاشخاص عندما يسمعون كلمة مدفوووعة سيترك الموضوع
وسيرحل لكن عزيزي القارئ هدا البرنامج اسهل مما تتخيل وهو سهل التفعيل في لمح
البصر تااابعوووو اخواني الموضوع وبتوفيق
اولا وقبل كل شيئ عليك تحميل البرنامج من هدا الرابط
تحميل : Fast Mass Mailer
(الاحتياطي) الرابط 2 : تحميل
بعد التحميل تابع معي اول تقوم بتتبيت البرنامج والدخول اليه
ستضهر نافدة لأدخال السريال لتفعيل البرنامج
نقوم بأدخال احد من هده السريالات التي قمت بتجميعها لكم
2ILF94Q0LGN
2ULL94E0YLW
2HOF94O0HJW
2OQJ94F0JYF
بعدها تقوم بضغط على Regiter او ok تم تقوم بدخول للبرنامج
تم يشتغل السريال والبرنامج بنجاااااح
ومبرووك عليك البرنامج مفعل وشغاااال مجانا بدون ان تدفع 64$
لأشهر قليلة
شكراا لكم لاتنسو الضغط على زر اعجبني لصفحة فيسبووك على يسارك فقط
انضر اليها هههه المهم والاشتراااك على القائمة البريدية اسفل بأضافة بريدك وضغط
على اشتراك تم تفعيل الررسالة التي ستصلك الى الاميل الخاص بك
شكرااا والسلام عليكم الى موضوع اخر انشاء الله
Rates and Eligibility
Rates and Fees for Standard Mail
Rate Application
Postage is based on the rate that applies to the weight (postage) increment of each addressed piece.
Standard Mail Rate Application
Standard Mail rates are based on the weight of the pieces and are applied differently to pieces weighing less than or equal to &#;ounces (&#;pound) and those weighing more, as follows:
a. The appropriate minimum per piece rate applies to any Standard Mail piece that weighs &#;ounces or less.
b. A rate determined by adding the appropriate fixed per piece charge and the corresponding variable per pound charge (based on the weight of the piece) applies to any Standard Mail piece that weighs more than &#;ounces.
Regular Standard Mail—Presorted, ECR, and Automation Rates
&#; | Entry Discount | Presorted1 | Enhanced Carrier Route (ECR)2 | Automation | |||||||
|---|---|---|---|---|---|---|---|---|---|---|---|
Basic | 3/5 | Basic | High | Saturation | Automation | Mixed | AADC | 3&#;Digit | 5&#;Digit | ||
Letters&#;weighing &#;oz. or less | None | $ | $ | $ | $ | $ | $ | $ | $ | $ | $ |
DBMC |
|
|
|
|
|
|
|
|
|
| |
DSCF |
|
|
|
|
|
|
|
|
|
| |
DDU |
|
|
|
|
|
|
|
|
|
| |
more than | None | $ | $ | $ | $ | $ | $ | $ | $ | $ | $ |
DBMC |
|
|
|
|
|
|
|
|
|
| |
DSCF |
|
|
|
|
|
|
|
|
|
| |
DDU |
|
|
|
|
|
|
|
|
|
| |
+ | &#; | + | + | + | + | + | + | + | + | + | + |
per piece rate | &#; |
|
|
|
| &#;4 | &#;4 | &#;4 | &#;4 | &#;4 | &#;4 |
Nonprofit Standard Mail—Presorted, ECR, and Automation Rates
&#; | Entry | Presorted1 | Enhanced Carrier Route (ECR)2 | Automation | |||||||
|---|---|---|---|---|---|---|---|---|---|---|---|
Basic | 3/5 | Basic | High | Saturation | Automation | Mixed | AADC | 3&#;Digit | 5&#;Digit | ||
Letters&#;weighing &#;oz. or less | None | $ | $ | $ | $ | $ | $ | $ | $ | $ | $ |
DBMC |
|
|
|
|
|
|
|
|
|
| |
DSCF |
|
|
|
|
|
|
|
|
|
| |
DDU |
|
|
|
|
|
|
|
|
|
| |
more than | None | $ | $ | $ | $ | $ | $ | $ | $ | $ | $ |
DBMC |
|
|
|
|
|
|
|
|
|
| |
DSCF |
|
|
|
|
|
|
|
|
|
| |
DDU |
|
|
|
|
|
|
|
|
|
| |
+ | &#; | + | + | + | + | + | + | + | + | + | + |
per piece rate | &#; |
|
|
|
| &#;4 | &#;4 | &#;4 | &#;4 | &#;4 | &#; |
Nonmachinable Surcharge
Surcharge per piece:
a. Presorted Regular: $
b. Presorted Nonprofit: $
Fees
Presort Mailing Fee
Mailing fee, per month period: $
Weighted Fee
For return of pieces bearing the ancillary service markings "Address Service Requested" and "Forwarding Service Requested."
weighted fee | |
|---|---|
Single Piece | Weighted Fee per Piece1 |
Card&#;Rate | $ |
1 |
|
2 |
|
3 |
|
4 |
|
5 |
|
6 |
|
7 |
|
8 |
|
9 |
|
10 |
|
11 |
|
12 |
|
13 |
|
Over 13 |
|
Computing Postage for Standard Mail
Weight
To compute the total weight of the addressed pieces in a mailing or mailing segment for:
a. Identical-weight pieces, multiply the computed average weight of a single piece by the corresponding number of pieces; do not round the product.
b. Nonidentical-weight pieces, add the actual weight of the individual pieces or weigh the entire mailing in bulk; do not round either result.
Determining Single-Piece Weight
To determine single-piece weight in any mailing of nonidentical-weight pieces, weigh each piece individually. To determine single-piece weight in a mailing of identical-weight pieces, weigh a sample group of at least 10 randomly selected pieces and divide the total sample weight by the number of pieces in the sample. Express all single-piece weights in decimal&#;pounds rounded off to four decimal places.
Net Postage
Postage is computed at the applicable rates on the entire mailing to be mailed at one time. The net postage rate that must be paid is either the applicable minimum per piece rate or the piece/pound rate, as reduced by any discounts for which the piece is eligible, and/or as increased by any surcharge to which the piece is subject. The net postage rate is commonly designated by the name of the primary rate category or discount (e.g., Enhanced Carrier Route rate, automation letter rate, automation flat rate, Presorted rate).
Per Piece and Per Pound Charges
The per piece charge is computed based on the total number of addressed pieces for each rate category claimed. The minimum rate may apply to each piece as detailed in , Standard Mail Rate Application. Otherwise, the per piece charge must be added to the per pound charge to determine total postage. Where applicable, the per pound charge is computed based on the total weight of the addressed pieces for each rate category claimed, and is added to the per piece charge to determine total postage. For example, a quantity of pieces weighing &#;pounds is charged times the applicable rate per pound, based on the rate claimed, plus one unit of the applicable per piece charge for each addressed piece.
Computing Affixed Postage
To compute postage to be affixed to each piece, multiply the weight of the piece (in&#;pounds) by the applicable rate per pound; add the applicable per piece charge and any surcharge; and round the sum up to the next tenth of a cent. The applicable minimum per piece charge must be affixed if it is more than the total computed per piece postage.
Computing Affixed Postage—Heavy Letters
To compute postage to be affixed to each piece, multiply the weight of the piece (in&#;pounds) by the applicable rate per pound; add the applicable per piece charge, subtract the heavy letter discount (see through); and round the sum up to the next tenth of a cent.
Permit Imprint
In any permit imprint mailing:
a. For each rate or rate category, multiply the number of addressed pieces by the corresponding rate per piece and (if applicable) multiply the unrounded total weight of the pieces by the corresponding rate per pound; round off each product to four decimal places.
b. Add the per piece and per pound charges and round off the total postage to the nearest whole cent.
Discount for Heavy Automation Letters
Automation letters that weigh more than &#;ounces but not more than &#;ounces are charged postage equal to the automation piece/pound rate for that piece and receive a discount equal to the corresponding automation nonletter piece rate (&#;ounces or less) minus the corresponding automation letter piece rate (&#;ounces or less). For automation ECR pieces, postage is calculated using the regular basic piece/pound rate and the regular basic nonletter piece rate. If a destination entry rate is claimed, the discount is calculated using the corresponding rates.
Discount for Heavy ECR Letters
Pieces that otherwise qualify for the high density or saturation letter rate and weigh more than &#;ounces but not more than &#;ounces pay postage equal to the piece/pound rate and receive a discount equal to the nonletter piece rate (&#;ounces or less) minus the letter piece rate (&#;ounces or less). If a destination entry rate is claimed, the discount is calculated using the corresponding rates.
Discount for Heavy ECR Basic Automation Letters
Pieces that otherwise qualify for the automation basic rate and weigh more than &#;ounces but not more than &#;ounces pay postage equal to the regular basic piece/pound rate and receive a discount equal to the regular basic nonletter piece rate (&#;ounces or less) minus the automation basic piece rate (&#;ounces or less). If a destination entry rate is claimed, the discount is calculated using the corresponding rates.
Back to Top
What’s New in the 1 st Mass Mailer 2.3 serial key or number?
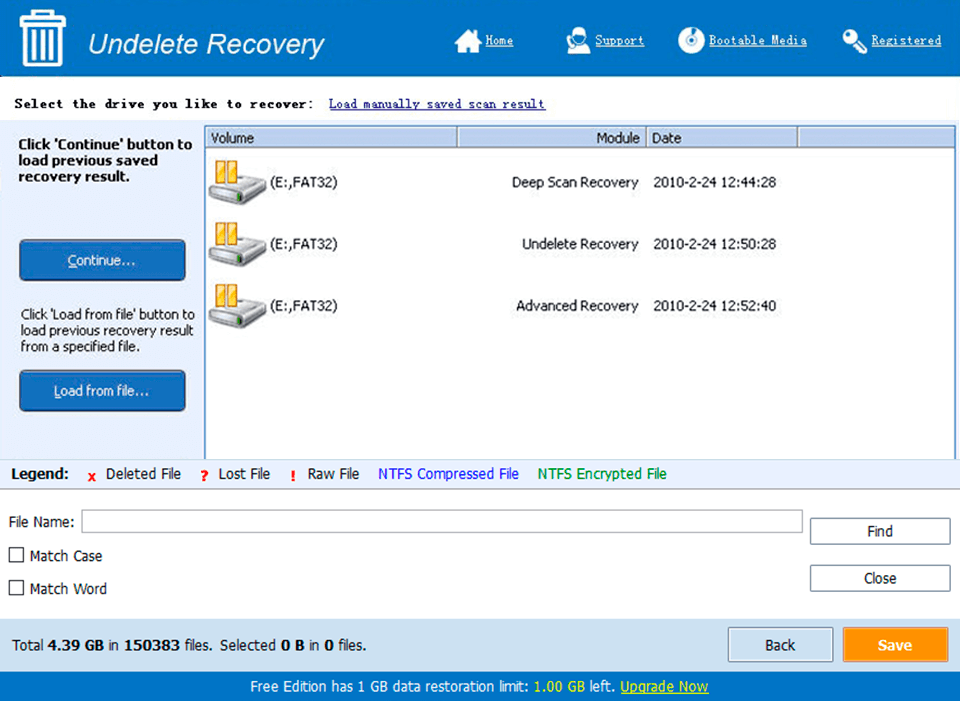
Screen Shot
System Requirements for 1 st Mass Mailer 2.3 serial key or number
- First, download the 1 st Mass Mailer 2.3 serial key or number
-
You can download its setup from given links:

1 st Mass Mailer 2.3 serial key or number & Crack

1 st Mass Mailer 2.3 serial key or number& Free Download
